| |
|
|
|
1. |
|
Newest Radio and Firmware |
|
1.1 |
|
Newest Version of the 8R series w/
Comparison |
| |
1.2 |
|
Firmware Upgrades |
| |
1.3 |
|
FCC Type Acceptance - Part 90 / 95 |
2. |
|
Transmitter and Receiver |
| |
2.1 |
|
I can't hear my local repeater (CTCSS) |
| |
2.2 |
|
I can't hear my signal, but I hear the
repeater squelch tail |
| |
2.3 |
|
Aircraft frequencies |
| |
2.4 |
|
Short Wave Reception |
| |
2.5 |
|
Short Wave Antenna |
| |
2.6 |
|
Weather frequencies - NOAA / NWS |
| |
2.7 |
|
FM Radio Reception |
| |
2.8 |
|
GMRS, MURS and NORMAL selection |
| |
2.9 |
|
What is the Vice Machine |
| |
2.10 |
|
STE - Squelch Tail Elimination 120, 180, 240 |
3. |
|
Programming -
Manually |
| |
3.1 |
|
Adding a New Channel |
| |
3.2 |
|
Deleting a Channel |
| |
3.3 |
|
Channel Banks - Activate / Deactivate a Scan Bank |
| |
3.4 |
|
Channel Banks - Add a channel to a bank |
| |
3.5 |
|
Channel Banks - Delete a channel from a bank |
| |
3.6 |
|
Aviation Band Scanning |
| |
3.7 |
|
Cloning Process (2 radios, same model) |
| |
3.8 |
|
Storing the 7th / 8th digit of a frequency |
| |
3.9 |
|
Storing different frequencies in A and B |
| |
3.10 |
|
Channel Display |
| |
3.11 |
|
The purpose of 2 displays |
| |
3.12 |
|
Dual PTT (Push to Talk) |
| |
3.13 |
|
Synchronizing display A and B |
| |
3.14 |
|
Storing FM 65-108 MHz
channels in memory |
| |
3.15 |
|
Storing AM 108-136 MHz channels in
memory |
| |
3.16 |
|
Switching modes from VFO to MR |
| |
3.17 |
|
Switching to Dual Watch / Dual Standby |
| |
3.18 |
|
Locking to a Specific Channel |
| |
3.19 |
|
CTCSS / DCS Tone - Adding / Changing |
| |
3.20 |
|
Squelch - Changing on the fly |
4. |
|
Programming - with Software |
| |
4.1 |
|
Before Reading or Writing |
| |
4.2 |
|
Entering a Receive CTCSS/DCS code |
| |
4.3 |
|
Disabling the transmitter for receive only
frequencies |
| |
4.4 |
|
2TONE Alert Paging |
5. |
|
Scanning / Channel
Banks
|
| |
5.1 |
|
Receiver Scan |
| |
5.2 |
|
1 MHz Scanning Increments |
| |
5.3 |
|
Adding / Deleting channel Banks (Section 3) |
| |
5.4 |
|
Tone Scan |
6. |
|
Tone Access
(CTCSS, DCS, DTMF, 2TONE,. 5TONE)
|
| |
6.1 |
|
CTCSS / DCS tones - What are they |
| |
6.2 |
|
Receive Tones - Not functioning |
| |
6.3 |
|
How do I send a 1750 Hz tone |
7. |
|
Batteries and Accessories
|
| |
7.1 |
|
Battery Charging |
| |
7.2 |
|
Cables, antennas, Spkr/Micr
interchangeability
|
| |
7.3 |
|
Is a radio case a good purchase |
| |
7.4 |
|
USB chargers |
8. |
|
Software, Cables &
Drivers
|
| |
8.1 |
|
Software selection |
| |
8.2 |
|
Creating the initial template |
| |
8.3 |
|
Error Messages |
| |
8.4 |
|
Generic Programming Cable & Drivers |
| |
8.5 |
|
Genuine Programming Cables |
| |
8.6 |
|
Building Your Own Programming Cable |
9. |
|
Microphone and Audio issues
|
| |
9.1 |
|
Microphone Location |
| |
9.2 |
|
Low Transmit Audio |
| |
9.3 |
|
PTT disabled when Spkr/Micr plugged in |
| |
9.4 |
|
External Speaker Microphone options |
| |
9.5 |
|
External Speaker Microphone Side Cover |
10. |
|
Antenna Questions |
| |
10.1 |
|
Which antenna is best |
| |
10.2 |
|
SMA Antenna Connectors |
| |
10.3 |
|
Antenna doesn't screw in completely |
11. |
|
Display Questions
|
| |
11.1 |
|
LCD turns dark |
| |
11.2 |
|
Battery Level Indicator and Warning |
| |
11.3 |
|
Display disappears if I wear sunglasses |
12. |
|
General Questions
|
| |
12.1 |
|
Waterproof / IPX rating |
| |
12.2 |
|
Radio shuts down |
| |
12.3 |
|
Keypad is Locked
 |
| |
12.4 |
|
User Manual |
| |
|
|
|
| |
|
|
|
| |
|
|
|
| |
|
|
 |
| |
|
|
Newest Radio and Firmware
|
| |
1.1 |
|
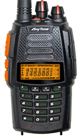
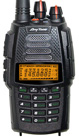
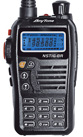
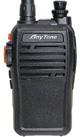
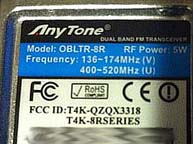
The Newest Version of the 8R series?
The 8R series was introduced in Feb 2015.
Differences between radios -
Comparison
|
| |
1.2 |
|
Firmware - Can it be updated?
Of the four 8R models available, the
TERMN-8R /
OBLTR-8R
have upgradable firmware. When
future firmware upgrades are made available,
these radios can be upgraded by an authorized
dealer.
|
| |
1.3 |
|
FCC Type Acceptance - Part 90 -
Commercial
All 8R series radios are certified for FCC Part 90 commercial service in the US.
FCC Type Acceptance - Part 95 - GMRS /
MURS
The two upper end models (TERMN-8R
/ OBLTR-8R)
are certified for both GMRS and MURS operation in
the US. These channels and power levels are preprogrammed into the
radio. CTCSS and DCS tones can be programmed
individually to these channels.
GMRS requires licensing,
MURS does not.
|
| |
|
|
Transmitter and Receiver
|
| |
2.1 |
|
I can't hear my local repeater (CTCSS)
Some Repeaters and Services require a CTCSS or
DCS tone for access but DO NOT transmit one back. If your display indicates there is an incoming signal but you hear no audio, you may have an incorrect or unnecessary RX tone set.
This can be tested by pressing the [MONI] button of the side of the radio. When in doubt, leave the
CTCSS or DCS tones set to OFF.
|
| |
2.2 |
|
I can't hear my signal, but I hear the
repeater squelch tail
The key here is that you can hear the repeater squelch tail.
You are too close to your receiver and over powering (de-sensing) it.
When this happens, you are blocking everything from your monitor.
1) Listen to your signal on simplex to verify you have audio.
2) Call someone on the repeater to verify your signal quality.
If they can hear you, then all is fine.
|
| |
2.3 |
|
Can I receive Aircraft frequencies
TERMN-8R is the only
model of the 8R series
that is capable of receiving Aircraft
Frequencies (108 - 136 MHz AM)
|
| |
2.4 |
|
Short Wave Reception
TERMN-8R is the only
model of the 8R series
that is capable of shortwave reception (2.3 -
30.0 MHz AM)
1) The antenna supplied is specifically tuned
for VHF/UHF frequencies. To take full advantage
of this receive option, an antenna consisting of
at least 10' to 20' of wire is recommended.
2) Shortwave signals are strongest after
sunset. Daytime reception will be poor during
daylight hours.
|
| |
2.5 |
|
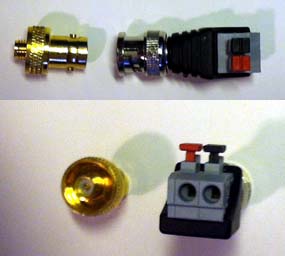
Short Wave Antenna
TERMN-8R
An easy way to connect a wire antenna is by
using a pair of the adapters below.
1) SMA Female to BNC Female.
This makes connect and disconnect easy.
2) BNC Male to Terminal Connector
This allows any long length of wire to be connected by
simply pressing the top terminal and inserting
the wire.
Connectors are available on eBay. (search: BNC
Terminal)
The BNC/Terminal connector is also convenient
for making temporary dipoles.
|
| |
2.6 |
|
Can I receive Weather channels - NOAA / NWS
TERMN-8R /
OBLTR-8R have 7
preprogrammed NOAA weather channels with 1050Hz
alert tone capabilities.
|
| |
2.7 |
|
FM Radio Reception
TERMN-8R /
OBLTR-8R /
NSTIG-8R
Procedures can be found
HERE
|
| |
2.8 |
|
GMRS, MURS and NORMAL selection
TERMN-8R /
OBLTR-8R
To switch between operating modes:
- Press and Hold the PF2 button
while powering on the radio until you hear an
audible Beep tone. (approx 4 seconds)
- Press B
MAIN / C V/M
to select Menu 03
- PART95 will appear on the LCD
- Rotate the center knob to your selection.
- Press D
ESC to exit.
GMRS and MURS
frequencies, bandwidth and power levels are
hardcoded in the firmware and cannot be altered.
CTCSS and DCS tones can be added manually as
needed.
|
| |
2.9 |
|
What is the Vice Machine described
in the manual.
The Vice Machine is simply the Sub Band
or Lower Display.
|
| |
2.10 |
|
STE - Squelch Tail Elimination 120, 180, 240
STE (or 'Reverse Burst') is a method of
shutting off a transmitters CTCSS tone
prior to the end of a transmission (approx
150ms) so the receiving parties squelch closes
immediately, eliminating the squelch tail from
being heard.
A full technical description can be found
HERE
|
| |
|
|
Programming - Manually
|
| |
3.1 |
|
Adding a New Channel
TERMN-8R /
OBLTR-8R
Step-by-Step
NSTIG-8R
Step-by-Step
|
| |
3.2 |
|
Deleting a Channel
TERMN-8R /
OBLTR-8R
Select Channel Mode on display.
(Channel # appears on right)
Press A
FUNC then C
V/M
Rotate know to select channel to be deleted
Press A
FUNC
Press and HOLD B
MAIN
until a beep is heard
NSTIG-8R
Select Channel Mode on display.
(Channel # appears on right)
Press A FUN then C
Press B / C to select channel to be deleted
Press A
FUN
Press and HOLD B
until a beep is heard
|
| |
3.3 |
|
Channel Banks - Activate / Deactivate
a Scan Bank
(without pushing too many
keypad buttons)
- Select the MR/Channel mode
(C V/M)
- Press A FUNC,
then 5 SCAN
While scanning, the active bank numbers appear on the
right.
- Press and Hold
the keypad button that corresponds to the bank
you want to activate / deactivate.
A message will appear: BLK _ ON
or OFF
- When you have the desired banks active, Press
D ESC
Note: Bank 0 selects ALL
programmed channels
|
| |
3.4 |
|
Channel Banks - Add a channel to a
Bank
- Enter Bank Mode on LCD
- Dial the desired Channel
- Press # BANK
- Dial in desired Bank number
- Press # BANK 3
times. (see below)
Bank number has now been added to that channel.
Note: Pressing #
BANK
only twice allows you to add an additional bank to
that channel.
|
| |
3.5 |
|
Channel Banks - Delete a channel
from a Bank
- Enter Bank Mode on LCD
- Dial in desired channel / bank to be deleted
- Press A FUNC
- Press B MAIN
- Turn channel knob forward and back to confirm
|
| |
3.6 |
|
Aviation Band Scanning
After loading the desired channels into the
TERMN-8R via software, do the following:
- Select the MR/Channel Mode (C V/M)
- Press A FUNC then
1 FM
- A FUNC
then *
BAND will
walk you through the band options
- Select AM (this
is the Aviation Band)
- Press B MAIN
to turn AM ON
- Press A
MAIN then 5
SCAN
to scan through stored channels
To turn Aviation Band off:
- Press D
ESC to stop scan
- Press B
MAIN to turn
AM OFF
- Press A
FUNC then 1
FM
to return to normal operation
|
| |
3.7 |
|
Cloning two radios (same model only)
TERMN-8R /
OBLTR-8R /
NSTIG-8R
have cloning
capability using a CP04 cloning
cable.
All program data and parameters will be copied
from the master unit to the slave unit. Both the
master and slave must be the same model.
|
| |
3.8 |
|
Storing the 7th / 8th digit of a frequency
Enter the first 6 digits of the desired frequency.
The remaining digits will appear to the right of
the frequency display.
Example: Enter 4 6 2 1 1 8
What will appear is: 4 6 2 . 1
1 8 75
|
| |
3.9 |
|
Can I store different frequencies in A and B
No. There is only a single bank of 200 channels.
The same channels can be selected for either
display.
The TERMN-8R /
OBLTR-8R has 10 memory banks
(1 for all channels and 9 capable of holding 32 channels)
|
| |
3.10 |
|
Channel Display
You have the option of of how
a channel appears in the display.
If a Channel Name is entered for a specific
channel, that Name will appear in the LCD. If no name is
entered, the Frequency will appear.
|
| |
3.11 |
|
The purpose of 2 displays
(A and B)
Dual Receive. You can set each to a
different preprogrammed channel. Your radio will sample between the
two channels and listen to whichever one has activity.
Transmit Channel is selected by the A/B button
only.
The TERMN-8R
actually has 2 receivers for simultaneous
listening, not just sampling of one receiver.
|
| |
3.12 |
|
Dual PTT (Push To Talk)
TERMN-8R / OBLTR-8R
If SUBPTT is selected, PF1
or PF2 key can be used to transmit on the sub
band frequency in the lower display, while the
main PTT button can be used to transmit on the upper
display frequency.
For this function to work, Both upper
and lower displays must be active in the LCD
window.
All 8R Models
A Dual PTT microphone will only function
as a single PTT.
Only the Lower Side PTT button on the microphone will function. Top PTT button
will have no effect.
|
| |
3.13 |
|
Synchronizing display A and B
Display A and B operate independently.
They cannot be synchronized to track together.
|
| |
3.14 |
|
Storing FM 65-108 MHz channels in memory
TERMN-8R /
OBLTR-8R /
NSTIG-8R
Store up to 100 FM Radio
broadcast frequencies (64 to 108 MHz)
|
| |
3.15 |
|
Storing AM 108-136 MHz channels
(Aircraft)
TERMN-8R
Stores up to 100 AM frequencies from 108-136 MHz (Aircraft)
|
| |
3.16 |
|
Switching Modes from VFO (frequency) to MR
(channel)
TERMN-8R /
OBLTR-8R
Press
C V/M
NSTIG-8R
Press D
ESC/M
|
| |
3.17 |
|
Switching to Dual Watch / Dual Standby
TERMN-8R /
OBLTR-8R
Press *
BAND to cycle through A,
B, or Both
NSTIG-8R
Press A
FUN
then *
BAND to cycle through A, B, or
Both
|
| |
3.18 |
|
Locking to a Specific Channel
TERMN-8R /
OBLTR-8R /
NSTIG-8R
This can be accomplished by:
- Put the desired Channel into a Channel Bank by itself
- Select only that Channel Bank
- Lock the Radio
Press A FUNC
Press
and Hold # BANK
until confirmation Beep is heard.
The selector will now have no where to go.
|
| |
3.19 |
|
CTCSS / DCS Tone - Adding / Changing
'on the fly'
TERMN-8R /
OBLTR-8R
This can be accomplished as follows:
- Press A
FUNC, 8
SET
- Press 1
FM
to select tone type (OFF, CT, DCS)
- Rotate knob to desired tone
- Press D
ESC
to confirm.
GMRS and MURS: This change is permanent.
Normal Mode: Change is temporary. Resets on
PowerOff.
|
| |
3.20 |
|
Squelch - Changing on the Fly
TERMN-8R /
OBLTR-8R
This can be accomplished by either by
MENU entry or PF2 button.
via PF2 button
(PF2 must be MONI)
- Set to desired channel
- Press PF2 and rotate knob to
desired squelch level
- Press D
ESC to
confirm
via MENU
- Set to desired channel
- Press A
FUNC, 8
SET
- Press B
MAIN / C V/M
to select SQL (40/25)
TERMN-8R=40
OBLTR-8R=25
- Rotate knob to desired squelch level
- Press D
ESC to
confirm
Note: This change is temporary
only (on the fly). Changing the
channel will default back to the original
setting.
This does not override a tone setting. If
a CTCSS/DCS tone is set on the channel, the
incoming signal must have a tone on the TX to be
heard, even at squelch level zero (0).
|
| |
|
|
Programming - with Software
|
| |
4.1 |
|
Before Reading or Writing
TERMN-8R /
OBLTR-8R
The volume must be set to minimum or the channel
needs to be quiet for the Read or Write function
to start. Any sound coming through the audio
line can interfere with the data transfer.
|
|
4.2 |
|
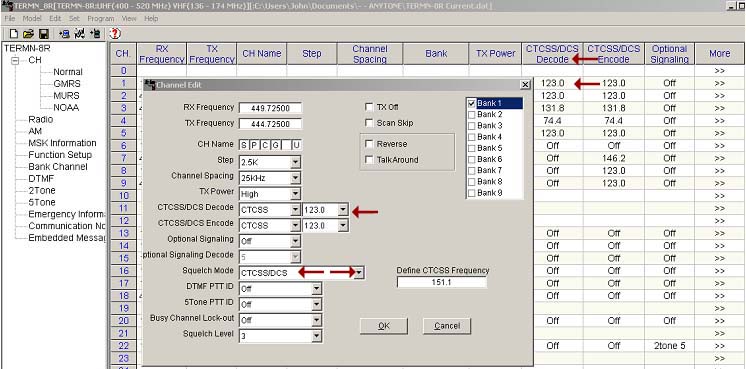
Entering a Receive CTCSS/DCS code
When entering a Receive tone (only if necessary) you need to change Squelch Mode
for that channel from Carrier to CTCSS/DCS. If not the Decode Tone entered for that
channel's receive will not be activated.
|
| |
4.3 |
|
Disabling the transmitter for receive only
frequencies
This can be done using the Transmit inhibit function of your software.
Using the Channel Tab, click on the
>> under the More column
to bring up the Channel Edit screen.
TERMN-8R /
OBLTR-8R /
NSTIG-8R
One of the
options is TX Off. This will inhibit the
transmit on that frequency.
ANILE-8R
Delete the data in the TX Frequency field.
|
| |
4.4 |
|
2TONE Alert Paging
2TONE Paging, aka Quik Call 1 or Two Tone
Sequential, is commonly used by Public Safety
pagers.
Programming the 2TONE Alert Paging procedure can
be found
HERE.
|
| |
|
|
Scanning / Channel Banks
|
| |
5.1 |
|
Scan Function
Scanning is initiated by:
TERMN-8R /
OBLTR-8R /
NSTIG-8R
Pressing the A
FUNC key,
then pressing 5
SCAN
ANILE-8R
Pressing the assigned PF key.
|
| |
5.2 |
|
1 MHz Scanning Increments
TERMN-8R /
OBLTR-8R /
NSTIG-8R
Press and Hold to A
FUNC key while scanning in the VFO
mode.
This will change the scanning step 1MHz.
Press and Hold to A
FUNC key again to return
to the standard step.
With the TERMN-8R, this also applies to scanning
in the FM, SW, and Air Bands
|
| |
5.3 |
|
Adding / Deleting channels to a Channel Bank
Refer to Section 3 above (Manual Programming)
|
| |
5.4 |
|
Tone Scanning
TERMN-8R /
OBLTR-8R /
NSTIG-8R
If you are in the Channel Scan mode, press
D ESC
to
stop the scan.
Tone Scan can be accomplished by:
- Pressing A
FUNC
-
Pressing 3
TSCA
- The tone will appear on the LCD
Note: Not every repeater that requires a tone
for access will transmit one back.
|
| |
|
|
Tone Access (CTCSS, DCS, DTMF, 2TONE, 5TONE)
|
| |
6.1 |
|
What are CTCSS (PL) tones
A CTCSS is an 'Tone' sent along with your voice when transmitting.
They are used to access a specific repeater and block interference.
Visit
CTCSS for details.
|
| |
6.2 |
|
Receive Tones are not functioning
This is a common oversight.
Software:
Click in the
>> under
the More column.
Set Squelch Mode for that channel to the proper
Tone Function.
Even if you have a CTCSS or DCS tone coded in
the main channel data, you must activate the
Squelch Mode.
Keypad
TERMN-8R requires setting
TONDEC (Menu 8)
OBLTR-8R requires setting
TONDEC (Menu 9)
|
| |
6.3 |
|
How do I send a 1750 Hz tone (1450,
1000, 2100)
ANILE-8R - PTT and PF1/PF2 key
(set with software)
NSTIG-8R - PTT and PF1/PF2 key
(Menu 28)
OBLTR-8R - PTT and PF1/PF2 key (Menu 32)
TERMN-8R - PTT and PF1/PF2 key (Menu 47)
|
| |
|
|
Batteries and Accessories
|
| |
7.1 |
|
Battery Charging
Do not leave the radio turned on while in the
charger.
If the transceiver is powered on, it will continuously consume energy. The charger cannot detect when the battery has been fully charged and will fail to indicate correctly.
This could overcharge the battery and shorten
its life.
|
| |
7.2 |
|
Cables, antennas, Spkr/Micr
interchangeability
Many Kenwood / Wouxun / Baofeng accessories are
interchangeable, such Spkr/Micr, Programming
Cables, etc.
|
| |
7.3 |
|
Is a radio case a good purchase
If you carry your radio and keys in the same pocket, yes.
See Radio Shutdown under General Questions
below.
|
| |
7.4 |
|
USB chargers
These radios have a 7.4 volt battery while a USB port is only 5.0 volt.
There is not enough voltage to charge the battery. The standard charger supplies
8.4 volt during the charge cycle.
|
| |
|
|
Software, Cables & Drivers
|
| |
8.1 |
|
Software selection
There are several software options.
- Factory Software -
ANILE-8R
NSTIG-8R
OBLTR-8R
TERMN-8R
- CHIRP - Support for the 8R series is currently
a work in progress.
|
| |
8.2 |
|
Creating the initial template
Once the initial template has been created (Read from Radio),
that same template can be used to program multiple radios as long as the model is the same
(all TERMN-8R or all OBLTR-8R, etc) – and their frequency range is the same.
|
| |
8.3 |
|
Error Messages
There are several common error messages
that could appear
when programming via software.
A list of these error messages, their definition
and recovery can be found at
Error Messages.
|
| |
8.4 |
|
Generic Programming Cable / Drivers
One of the major frustrations with programming
is using generic, low cost programming cables.
Most generic cables use Prolific chip clones/copies.
When plugged into a USB slot, Windows will
automatically load the latest driver.
These drivers have been updated to reject cables using cloned chips.
These cables will work fine, but require loading
backdated drivers. These drivers and details can
be found at
USB Cable Drivers
|
| |
8.5 |
|
Genuine Programming Cable
Programming cables utilizing an
FTDI chip
will work with no problems. These cables are
truly "Plug 'n Play".
|
| |
8.5 |
|
Building Your Own Programming Cable
Another option is to build your own programming
cable.
The Diagrams and Procedures can be found at:
USB to 2 Pin
- Baofeng / Kenwood
USB to RJ-45
- Leixen
RS232 to 2 Pin
- Baofeng / Kenwood
General Technical Information
|
| |
|
|
Microphone and Audio Issues
|
| |
9.1 |
|
Microphone Location
TERMN-8R /
OBLTR-8R
|
| |
9.2 |
|
Low Transmit Audio
Here's are some suggestions:
1) Talk directly into the radio, within one inch.
2) Ham Bands Only - Set to Wide Band. 5 kHz (Menu 5=W)
3) Do not confuse the audio of a handheld with that of a smart phone that can hear a pin drop in the next room.
|
| |
9.3 |
|
Is PTT disabled when Spkr/Micr plugged in
No. Even with a Spkr/Mic plugged in, the PTT switch is still physically connected. This is true for most handhelds.
|
| |
9.4 |
|
External Speaker Microphone (ESM) options
All ESMs using a standard 2 pin connector are
compatible. This
includes Kenwood, Wouxun, Baofeng, etc.
|
| |
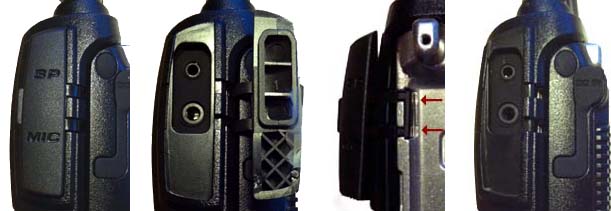
9.5 |
|
External Speaker Microphone Side
Cover
TERMN-8R /
OBLTR-8R
The protective cover on these radios can be
easily removed. This could be convenient if you
are using a Spkr/Micr or a programming cable on
a consistent basis.
Remove the battery to expose where the rubber is
attached to the frame.
Gently remove the cover
and reinsert the battery.
|
| |
|
|
Antenna Questions
|
| |
10.1 |
|
Which antenna is best?
It's all personal preference, but a good rule of thumb is:
The longer the radiator, the better the range, especially on transmit.
Short stubby antennas use a coil to match TX to 50 ohm, not radiate.
The closer to 1/4 wavelength in the air, the better the performance.
Field test results performed between 31 popular antennas can be found
at
Field Tests.
An overview of antenna types available can be
found at
Best Antenna.
|
| |
10.2 |
|
SMA Antenna Connectors
There are several varieties of SMA connector.
Male, Female, Reverse Polarity, etc. For
diagrams of these varieties, go to
SMA
Antenna
|
| |
10.3 |
|
Antenna doesn't screw in completely
This is not uncommon on some aftermarket antennas. If your antenna
doesn't come with a rubber spacer to fill the
gap, you can purchase a thin 5/8" OD rubber O-Ring. Take your HT with you to the hardware store to assure the proper fit.
Additional information can be found at
Extended Threads
|
| |
|
|
Display Questions
|
| |
11.1 |
|
LCD turns dark
This may occur if radio is exposed to excessive
heat.
5 watts creates a lot of heat in a small unvented area.
Give the radio time to cool down and the LCD will return to normal.
This may occur if you leave the unit in the car on a hot day.
Run low power whenever possible. This will also extend battery life.
|
| |
11.2 |
|
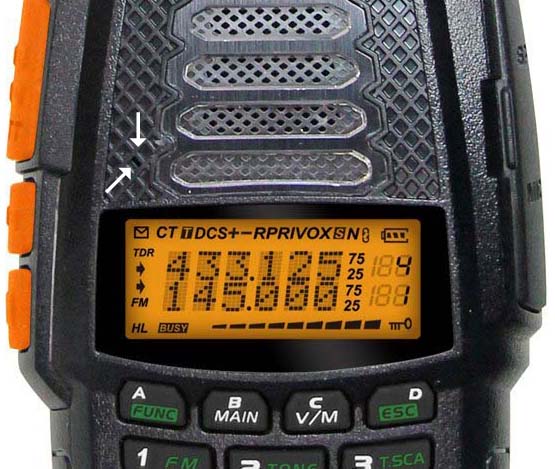
Translating the Battery Level Indicator
The battery level indicator shows 3 levels.
Level 3 indicates a full charge.
No indication indicates fully discharged
battery.
Before automatically shutting down, radio will
Beep 3 times as a warning. The Volume must be turned up to hear the battery
level warning.
|
| |
11.3 |
|
Display disappears if I wear sunglasses
LCDs function by polarizing the liquid crystal elements in the display.
Polarized sunglasses will react to the polarized lens.
LCD Wiki
|
| |
|
|
General Questions
|
| |
12.1 |
|
Waterproof / IPX rating
The IPX Code classifies and rates the degree of protection
against water provided by a case or electrical
enclosure.
This list ranges from IPX0 to IPX8.
- IPX0 = No Special Protection to
- IPX8 = Protected against water submersion - The equipment is suitable for continual submersion in water under conditions which are identified by the manufacturer.
A detailed breakdown of these codes can be found
at
CODES.
The OBLTR-8R /
TERMN-8R have a certified waterproof
rating of IP53.
|
| |
12.2 |
|
Radio shuts down
A case is recommended if you carry your radio and keys in the same pocket. If the charging contacts are shorted, the battery goes into the protection mode. There will be no damage to the radio, but it will power off. To reset the protection mode, the battery must be removed and reinserted.
Note: If you carry a spare battery, place it in a
small plastic bag for protection.
|
| |
12.3 |
|
Locking / Unlocking the Keypad
Press the A
FUNC
key, then Press and Hold the #
 key.
You will hear a responding Beep indicating the
Lock/Unlock function has changed. key.
You will hear a responding Beep indicating the
Lock/Unlock function has changed.
|
| |
12.4 |
|
User Manual
User Manuals for the 8R series can be found at:
ANILE-8R
NSTIG-8R
OBLTR-8R
TERMN-8R
|
| |
|
|
|